CAS Project: Creativity & Service Recycling Signs

CAS Project Process: 


When brainstorming ideas for my CAS project, I knew I wanted to focus on the service aspect of CAS. I am a service leader of OSC’s Recycling and Sustainability program, and I was brainstorming different projects I could do involving the service. I wanted to leave a mark on OSC, and the service group, something physical that will outlast my time at OSC, and remain useful for several years after. My original idea was to upgrade the current recycling room, as we had problems with insects and organization. However, we were relocated in January as new security turnstiles replaced the recycling room. We were relocated to a small section of the open parking lot, under a metal cover. We had a room built in that location to help protect the recyclables from rain, and falling debris such as leaves. 


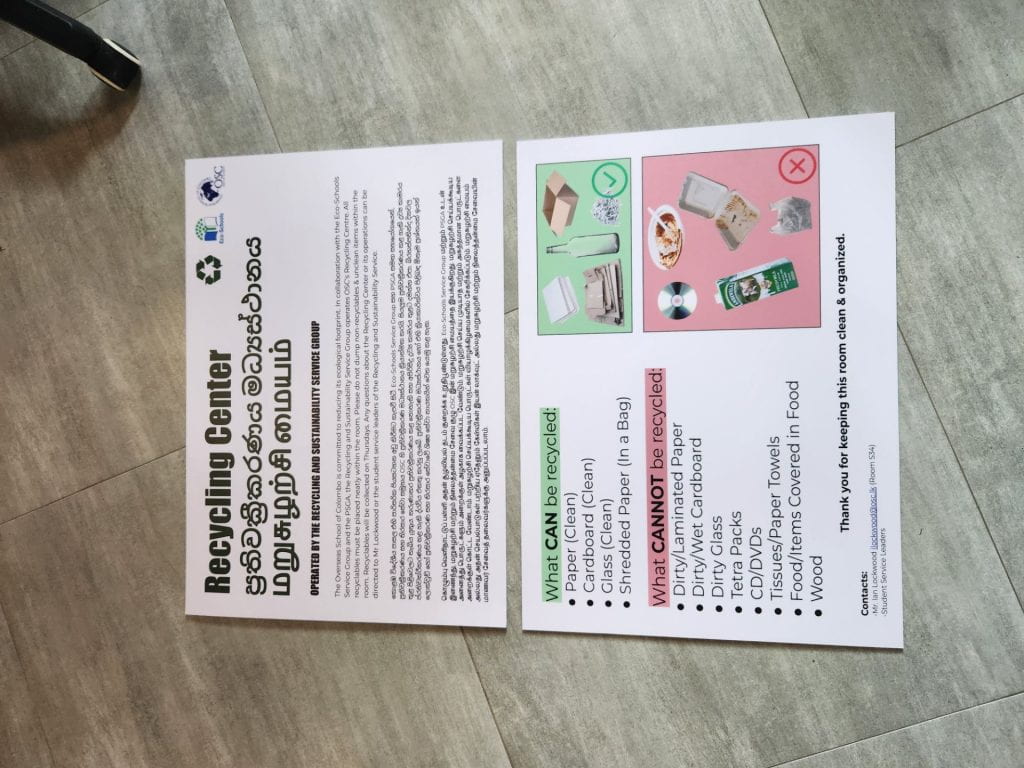
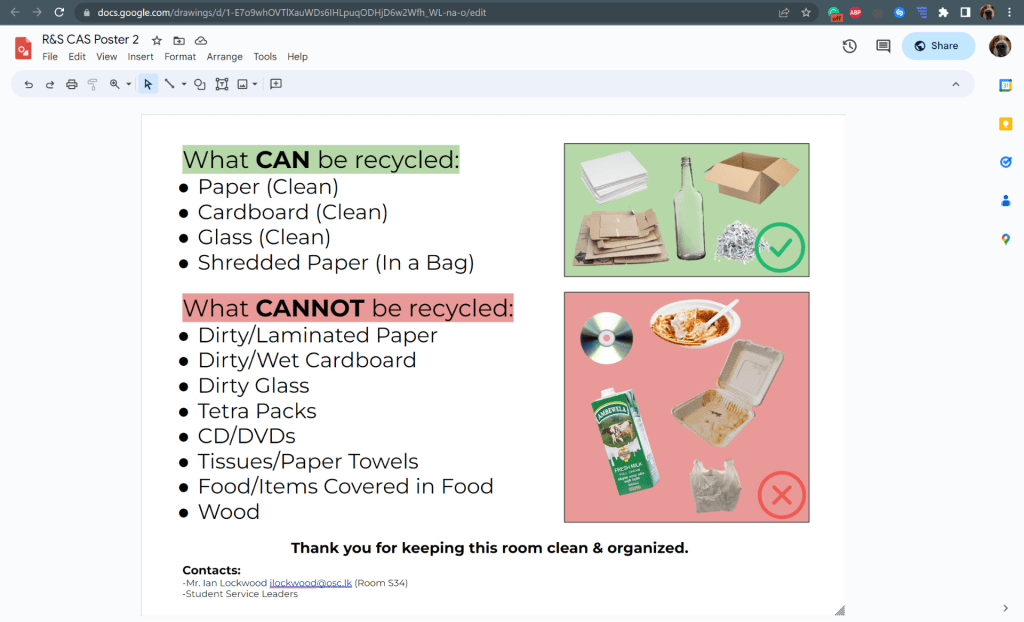
One major problem we face as a service is that non-recycling items are mixed into the recyclables. Additionally, we would often find that people would dump a large amount of paper and cardboard into the room in a disorganized manner. This would mean that we would spend the whole service block time cleaning and organizing the room. We also had no clear signage. So I decided for my CAS project, was to create a sign that indicates the rules of the recycling room, what can and cannot be recycled, and who to contact if they have any questions.


I decided on having 3 total signs, two outdoors in the room and one indoors. The first outdoor sign would indicate that this is where the recycling room is. Since we recently have moved location, it is important to make it clear to people where recyclables go, because otherwise they end up in the trash, and go to a landfill. The first sign will also have text highlighting OSC’s commitment to reducing its environmental footprint, how the recycling room is run, and rules regarding placing items in the room. I wanted to have this text in English, Tamil, and Sinhala, the national languages of Sri Lanka. I translated the text into Tamil and Sinhala and asked my housekeeper’s husband, who is fluent in both languages, to check the translation. The second sign will indicate what items can and cannot be recycled by the room. Currently, we collect mainly paper and cardboard, however, our scrap dealer will also accept (intact) glass and metal, but this is very rare to find on campus. We often get dirty cardboard, such as food-filled pizza boxes and tissues, both of which we do not deal with as it is both a hazard for our service group and attracts insects and rodents. The sign clearly shows that all items must be clean, this should reduce the amount of food and tissues we get in the recycling room. At the bottom of sign two, there is also contact information for Mr Lockwood, the service leader, and also the student leaders. The third sign will be placed inside the room and will highlight the information outside of the room, such as organization, and what materials can and cannot be recycled. Once I got a grammar and spelling check for all languages I downloaded my design as a PDF and went to my local print shop. The place I went to is called Leaf Next Day Print. I talked with a consultant, and they recommend that since these signs would be exposed to Sri Lanka’s humidity, temperature, and rain, the signs should be on compact foam board, and also laminated. I decided on an A2 size for the signs, which is 42, by 60 cm. A2, in my opinion, was the best dimension for these signs, as they both have to be readable from a distance, but also fit within my price range. The designs were printed by the next day, and I will hang them up in the room when we get back to school when Sinhala & Tamil New Year Holidays end. 


CAS Project Reflection:

This CAS project allowed me to explore both the Creativity and Service aspects of CAS. Creating this poster allowed me to improve and develop my graphic design skills. Additionally, I had to do research during the process. The information I learned from the research during this process I could use in other academic, and non-academic projects. Additionally, this project allows me to engage with a global issue, pollution, as this sign will make recycling at OSC more efficient. 


CAS Learning Outcomes: 

#1 Identify your own strengths and develop areas for personal growth.

#2 Demonstrate that challenges have been undertaken, developing new skills in the process. 

#3 Demonstrate how to initiate and plan a CAS experience.

#4 Show commitment to and perseverance in CAS experiences.

#6 Demonstrate engagement with issues of global significance.


Photos:

Finished Printed Sign 1 & 2, on Compact Foam Board
Finished Printed Sign 3, on Compact Foam Board
Digital Design of Sign 2

Creativity: OSCARS Preparation

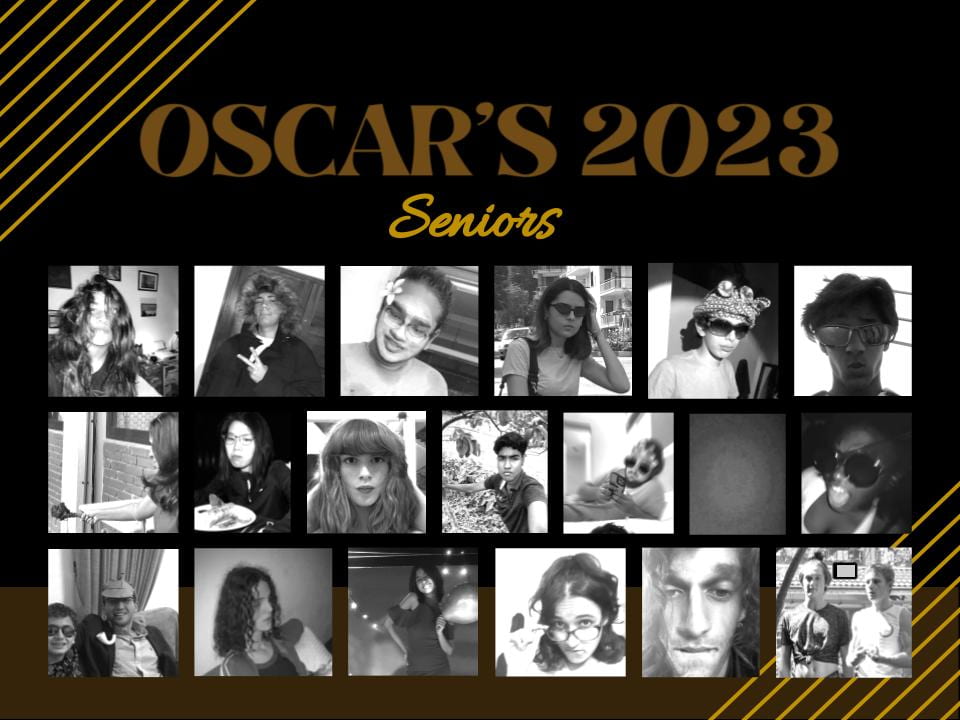
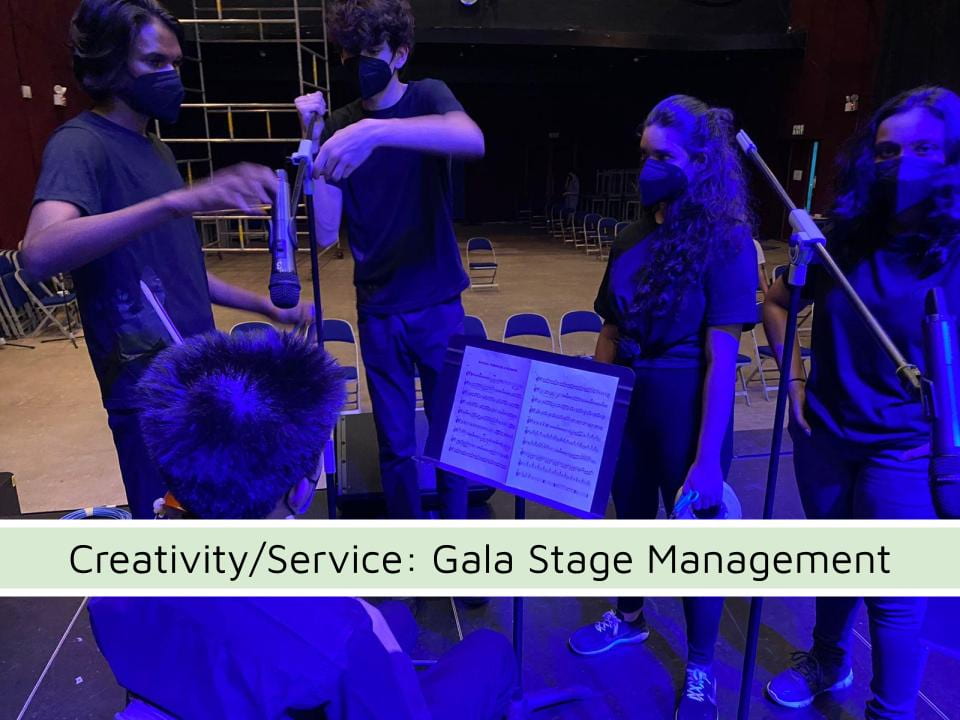
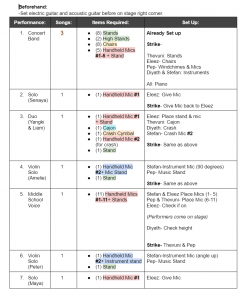
Summary of OSCARS Preparations:

As a grade representative of G12 within the SGA, I had the opportunity to help organize OSCARS, OSC’s prom. The initial start of the planning process was pretty rough. A Lot of our preferred venues were not available, and we had a budget problem. The DP grade reps, including myself, Eloise, and Pep were in charge of decorations for OSCARS. 


The theme of OSCARS was old Hollywood. We brainstormed decorations that would fit under the theme. Our first idea was a red carpet. We organized with the venue providers to get a red carpet to have on one side of the room. We also thought about balloons. The issue of environmental impact was raised and we tried to replace the balloons with paper lanterns. However, we could not find any paper lanterns in Colombo that could arrive for the event in a week. We also negotiated with the venue providers to give a basic flower arrangement on each other’s tables in addition to black tablecloths and chair covers, with gold ribbons. And the final decoration we decided on was a senior’s card. Zoe was in charge of the senior poster, which was not completed in time for use at OSCARS, however, I used the photos of the G12 members for the senior card. I designed a card that fit the theme of Hollywood but also represented each of the 20 seniors. I got 30 of the cards printed out at a print shop near my house, called Leaf Next Day Print. 


On the day of OSCARS, Saturday, I sent the designs to the print shop at 8 am, attended the OSC open day at 10 am, then collected both the balloons and cards at 2 pm, and DP grade reps and EXCO at 3 began to set up the OSCARS venue. OSCARS began at 7 pm, and ended at 10 pm, besides minor details such as the senior board, OSCARS turned out successful. 


Learning Outcomes: 

#2 Demonstrate that challenges have been undertaken, developing new skills in the process.

#3 Demonstrate how to initiate and plan a CAS experience.

#4 Show commitment to and perseverance in CAS experiences.

#5 Demonstrate the skills and recognize the benefits of working collaboratively.


Photos: 

Front of senior’s cards
Red carpet & balloons at venue
Table arrangement at the venue
Back side of senior’s OSCARS card


Creativity: Day 3 SAISA Art

Summary of SAISA Day 3:


Day three of SAISA art was our final day in Jordan. We began by celebrating the art we had created in our workshops on day 2. My group embroidery displayed our artwork by hanging them up on a wall down in the auditorium. Each of the participants also had to create an artist statement, which is similar to an artistic intention, which we often create in visual art. We got to see what the other workshops produced. I found the printmaking group particularly interesting, as they combined several techniques to create a print of the citadel, a landmark we visited on day one. After admiring each other’s art, everyone went into the buses to Mount Nebo. Mount Nebo is where Moses was granted a view of the promised land, before his death. From the landmark, you can see the dead sea, the west bank, and Jerusalem. We had lunch at Mount Nebo. We then attended a mosaic workshop, in which we were able to see how mosaics were made in Jordan. The owner of the mosaic store gave all students a 30% discount on all products. 


We then visited several Christian churches. My personal favourite was the Church of St John the Baptist. This church had a large clock tower which you could climb up to with ladders. Additionally, there was a tunnel system underneath the church. After visiting the churches, we had a farewell meal at a restaurant that served a variety of local dishes. We arrived back at ACS at around 6 pm. Since our flight was for 1 am, we got permission to spend 3 hours at the Taj mall beforehand. 


At 9:30 we left for the airport and slept in the check-in aisle as our flight had been delayed. We arrived back at OSC at 5 pm after 2 flights and a layover in Doha.


Learning Outcomes:


#1 Identify your strengths and develop areas for personal growth.

#2 Demonstrate that challenges have been undertaken, developing new skills in the process.

#5 Demonstrate the skills and recognize the benefits of working collaboratively.


Photos of SAISA Day 3:

Front of the Church of John the Baptist
Inside of the bell tower of John the Baptist Church
View from the bell tower of John the Baptist Church
Mosaic Workshop
Venue of the farewell meal


.

Creativity: Day 2 SAISA Art

Day Two of SAISA Art


Day two began with a buffet breakfast at the Rotana Hotel, in Jordan. We left for ACS at 8am. At ACS we split into our workshop groups. I was in embroidery because I wanted to explore a media I haven’t tried before. Other workshops included photography, graffiti, printmaking, stencils, geometric artwork, watercolor landscapes, and portrait drawing. We spent around an hour for the first half of the session practicing different stitching patterns for embroidery. We learned 5 different stitches which we could implement into our final piece. After practicing we went for lunch. Lunch was free and produced by four different food trucks brought onto campus. They served shawarma, falafel, hot dogs, and a type of fried dessert. During the lunch break, I also went over to the ACS spirit store, and bought ACS merch. There was also an open mic during the lunch time, when the ACS rock band performed numerous songs. There were also other activities during lunch, such as making a sand bottle, getting henna, playing various games, and learning Dabke. 


After the lunch break we continued with the embroidery. We had around an hour to finish our final piece. Which was not enough time for any of the members to finish their work. After our session, our group worked on a collaborative sculptural piece. The piece consisted of 10 wooden pieces, and we each got a piece to paint. Afterwards the wooden pieces would slot together to create a sculpture. 


We finished at around 4pm. Afterwards, OSC, and one of the other SAISA schools went to a mall for a few hours. After the mall we went to Beit Sitti. Beit Sitti means “grandmother’s house” in which a grandmother taught us how to make several different dishes. We made a type of biryani, and a salad. We were also given the recipes, so that we could recreate these dishes at home. Afterwards we headed back to the hotel, at around 9pm. 


Learning Outcomes: 

#2. Demonstrate that challenges have been undertaken, developing new skills in the process.

#5. Demonstrate the skills and recognize the benefits of working collaboratively.

Embroidery creations
Assembled Collaborative Projects
Beit Sitti Cooking
The Boards for the Collaborative Sculpture
ACS Rock Band Performing During Lunch


.


Creativity: Day 1 of SAISA Art Jordan


Our journey began on Wednesday morning, Sri Lankan time, when all 6 of us took a bus to the airport. We flew from Colombo to Doha, to Jordan, arriving at around 7 pm Jordanian Time. When we arrived we were greeted by the ACS’s head of activities who gave us all SAISA Art shirts, bags, and ACS student IDs. 


Day 1:

The first official day of SAISA art began when we arrived on ACS’s campus. We were greeted by the whole high school, as we walked from the entrance to the underground auditorium. The head of activities and the secondary principal gave speeches to the whole SAISA Art group. We split into groups, and OSC was grouped with AISD and TAISM. As a group, we visited the Citadel, National Gallery, and the Hashmi Murals. The Citadel is a stunning archaeological sight, in downtown Jordan. Atop a hill, there is an amazing view of the city. The structure of the citadel is around 4000 years old. At the citadel, we focused on refining our photography skills, aiming to capture unique angles, and interesting subjects. After the Citadel we went to the National Gallery, which was comprised of two buildings. In each building, we paired up and analysed different pieces of work. The second building featured interactive and modern art, such as a room that lit up when you took a breath. Afterwards, we went to the Hashmi murals, in downtown Jordan. These murals were painted on the sides of residential buildings. We were given a tour of these murals by a local street, and hip-hop artist. Most of the murals had political or social messages hidden within. After the murals, the whole SAISA art group combined for the Jordan National Museum which featured a wide range of historical artefacts. After the day officially ended, our group headed to the Taj Mall, to get dinner. We ended the day at 9 pm, when we arrived back at our hotel.

View of city from the Citadel
Citadel
Photograph of a building’s roof, at the Citadel
One of the Hashmi Murals
One of the paintings in the Jordan National Gallery


Sculptural Installation in the Jordan National Gallery


.

Creativity: SGA Bake Sale Cookies

Earlier this month, the SGA held a bake sale to raise funds for OSCARS OSC’s prom. I volunteered to bake chocolate chip cookies for the bake sale. Since the bake sale was open to all secondary school students, many snacks would be needed. Because of this, I decided to do quadruple portions of a recipe I regularly use. 

The ingredients were:

4 cups of salted butter

4 cups of white sugar

4 spuds of brown sugar

8 tsp of pure vanilla extract

8 large eggs

12 cups of flour

4 tsp of baking soda

2 tsp of baking powder

4 tsp of salt

8 cups of chocolate chips. 


The batter was too large to be mixed into any bowls, so 2 large cooking pots were used when mixing. The process took around 1.5 hours, as baking could only be done in 8 minutes increments on 2 oven trays. My mother and sister helped me throughout the process, especially with the preparation of the baking sheets. All of the cookies were brought to the bake sale, and all of them were sold in under 20 minutes. There were around 40+ cookies. After selling the cookies, I heard many compliments about the cookies, such as how soft and delicious they were. 


CAS Learning Outcomes:


#3 Demonstrate how to initiate and plan a CAS experience.

#4 Show commitment to and perseverance in CAS experiences. 


#5 Demonstrate the skills and recognize the benefits of working collaboratively. 

Creativity: Nerf Turret

Recently I developed a 3D-printed nerf dart Turret, documented in an earlier post. However I wanted to improve my design, so I developed a new turret. Unlike the original turret, this one would have an improved firing rate, a cooling system, a battery power supply, a larger ROM, a 300m RC range, brighter lights and less dart jamming. 

I designed this turret on Fusion 360, and the parts were 3D printed out in PLA. Some parts had to be redesigned to work more efficiently. Most of the turret has been printed out, over the span of several weeks. There are some parts that have yet to be designed such as the dart feeding system. However, right now the turret is approximately 60% complete. I hope to finish this project before 2023

Learning Outcomes: 

#1 Identify your own strengths and develop areas for personal growth.

#2 Demonstrate that challenges have been undertaken, developing new skills in the process.

#4 Show commitment to and perseverance in CAS experiences.

Creativity: Using CAD Skills to Design and Create a Nerf-Ball Shooting Turret

3D CAD is one of the skills I have been trying to improve over several years. Not only do I find CAD interesting and rewarding, but I will also be using similar software (Fusion 360, Blender) for university or design-related jobs. I also like to challenge myself with complex projects that I haven’t attempted before. One of the main ways I develop my skills in CAD is with large projects, and my most recent project is a 3D designed and printed nerf turret. The turret moves in 2 degrees of freedom and shoots using a remote control.

I designed the project using fusion 360, all of the designs are my own, and took a while to develop.

I 3D printed each of the individual parts and assembled each part. I did some basic electrical wiring, connecting the motors so that the turret could move, and shoot using a remote.


Video of the turret shooting: https://drive.google.com/drive/folders/1fuMkmRXtW61fJW4TnsGquRL6jNt9JgC9?usp=sharing


Learning Outcomes:

“Identify your strengths and develop areas for personal growth” With this project I was able to identify the skills within CAD that I was comfortable with, and skills I wanted to further develop.

“Demonstrate how to initiate and plan a CAS experience” This project took several months of on-and-off work, I had to develop a plan on how I was going to achieve my goal of producing a functioning nerf turret.

Creativity: Watch Charging Stand

Summary:

Recently I was fortunate enough to get a smartwatch as a gift. However, there was an issue I encountered with it. The simple magnetic puck type charger that the watch came with was very finicky. It was a challenge to connect the watch with the charger consistently. I looked online for a solution and saw several magnetic wireless charging stands for watches, however, they were priced 50$ and upward. I decided to make my charger stand instead. 


Design Process: 

I opened up Fusion 360, my 3d modelling software of choice, and designed a charging stand I found appealing. I went with an angular design, to contrast the curved design of the watch. I measured the magnetic puck charger and created a hole for the charger to fit within the stand. I carved out channels for the charger cable so that it could be guided out in an orderly fashion. 


I printed out the charger in 3 different parts, all in a light blue. I used a bit of super glue to fuse the parts. I placed the puck charger within the slot, and it friction fit, without any issues. The magnet on the charger was relatively strong, so I decided to add a tilt on the platform where the watch rests. The tilt makes the design more visually apeling and makes the screen easier to read when it’s charging. 


Learning Outcomes: 


The first primary outcome was “demonstrate that challenges have been undertaken, developing new skills in the process”. It was a challenge to design a functional yet visually appealing charger. Since the chargers I saw on the internet were not the aesthetic I was going for I did not have much reference material to make my charger. 


The second primary learning outcome was “Identify your strengths and develop areas for personal growth”. I had already had experience with the 3D design however I rarely make designs that have to function with preexisting electronics, so it was a new challenge for me. 

Photos: 

This is the 3D design of the charging stand

Stage Management

Summary: 

Twice a year, the school holds a Gala, one in spring and one in winter. However, due to covid 19, there has not been a gala for the past 2 years. However, restrictions being lifted allowed the school to organize a spring gala. Along with the performers, a stage management crew was needed. In total there were 5 stage management crew members including me. 


There were 2 whole days of rehearsals, in which we needed to create a plan on how to organize, move, and set up the stage for each performance. Each of the 21 performances required different setups, and everything needed to go smoothly.


We created a document in which we clearly outlined the required chairs, stands, instruments, and mics. We also stated which person had to deal with which item to limit confusion. We also had a booklet with a hand-drawn layout of each of the setups, noting down the microphone, stand, and chair placements. 

Our stage management plan

To help us with the placement of the items, we had to “spike” the stage. This involved taking pieces of duct tape and marking down the placement of items for each performance. We developed a system for labelling the spikes using different colour markers for different items. 

Me adjusting the mic stand (Credit Senaya)

The actual day of the Gala was very stressful, we made sure to check everything, and make sure everyone knew what their jobs were. We had some issues during the setup of a few performances, one of the mic stands was broken, and had to be switched out. 

IB learner outcomes:

This whole 3-day experience taught me a lot: The first primary ib learner outcome was “Demonstrate that challenges have been undertaken, developing new skills in the process.” Stage management was very challenging, it was extremely tedious to create an organisational system in which everything was accounted for. However, I did develop organizational skills, and the ability to develop detailed plans and strategies. 


Next to the learning outcome was “show commitment and perseverance in CAS experiences”. The whole 3-day process was 18 hours of work, it required a lot of perseverance, and commitment, as the entire gala performance depended on us. 


The final main learning outcome was “Demonstrate the skills and recognize the benefits of working collaboratively.” As a group, we were able to collaborate and develop our plans together in the most effective way. Without teamwork, we wouldn’t have been able to have effectively operated as a stage management team. 


Relaxing after a successful Gala performance
The stage management team creating a planning document